Example Lead Paint Projects in Chula Vista

Six examples follow, from one window to the shared stair of an apartment building, each with the house, the test result, the work and a rough price.

These are examples, not past jobs, clients or addresses. They draw on South Bay house ages, the steps lead work follows here and 2026 price ranges, so you can get a feel for a job before asking for a quote.

Lead test before turning a garage into a small home

Example project

Home
1960s single-story house in western Chula Vista with an attached garage
Original request
Know what the builder will disturb before the garage becomes a separate living unit
Testing
Readings on the garage walls, ceiling, the door into the house, the garage door trim and the eaves
Found
Lead paint on the door into the house, the garage door trim and the eaves; none on the garage walls
Report
A written report from a certified inspector the builder can price from
Estimated cost
$480

Scope of work

A visit to the garage and the outside around it, readings on each type of painted part the conversion will cut, move or cover, paint chips to the lab where a reading is unclear, and a written report.

Project overview

In this example, the owners of a 1960s house in western Chula Vista plan to turn the attached garage into a small separate home for a parent. The builder will cut new openings, take out the garage door and its trim, and replace the door into the house.

A test of only the parts the job will touch is enough here. It shows lead paint on the door into the house, the garage door trim and the eaves above, so the builder can price lead-safe work for those parts and treat the garage walls as ordinary drywall.

The goal

The goal is a conversion plan that knows where the lead paint is before the first cut.

Process

  1. Booking Build year confirmed and the conversion plans shared with the inspector.
  2. Testing Readings on each part the conversion touches, with chips sent where a reading is unclear.
  3. Report Positive and negative parts listed, ready for the builder.

Planning right

  • Test before the builder prices the job, so lead-safe work is in the bid, not a surprise.
  • Cutting a new door or window through painted wood falls under federal lead-safe rules.
  • Parts that test clear can be worked on the usual way.
  • Keep the report. It also helps if the unit is rented out later.

Get a free quoteMore about lead paint inspection and testing
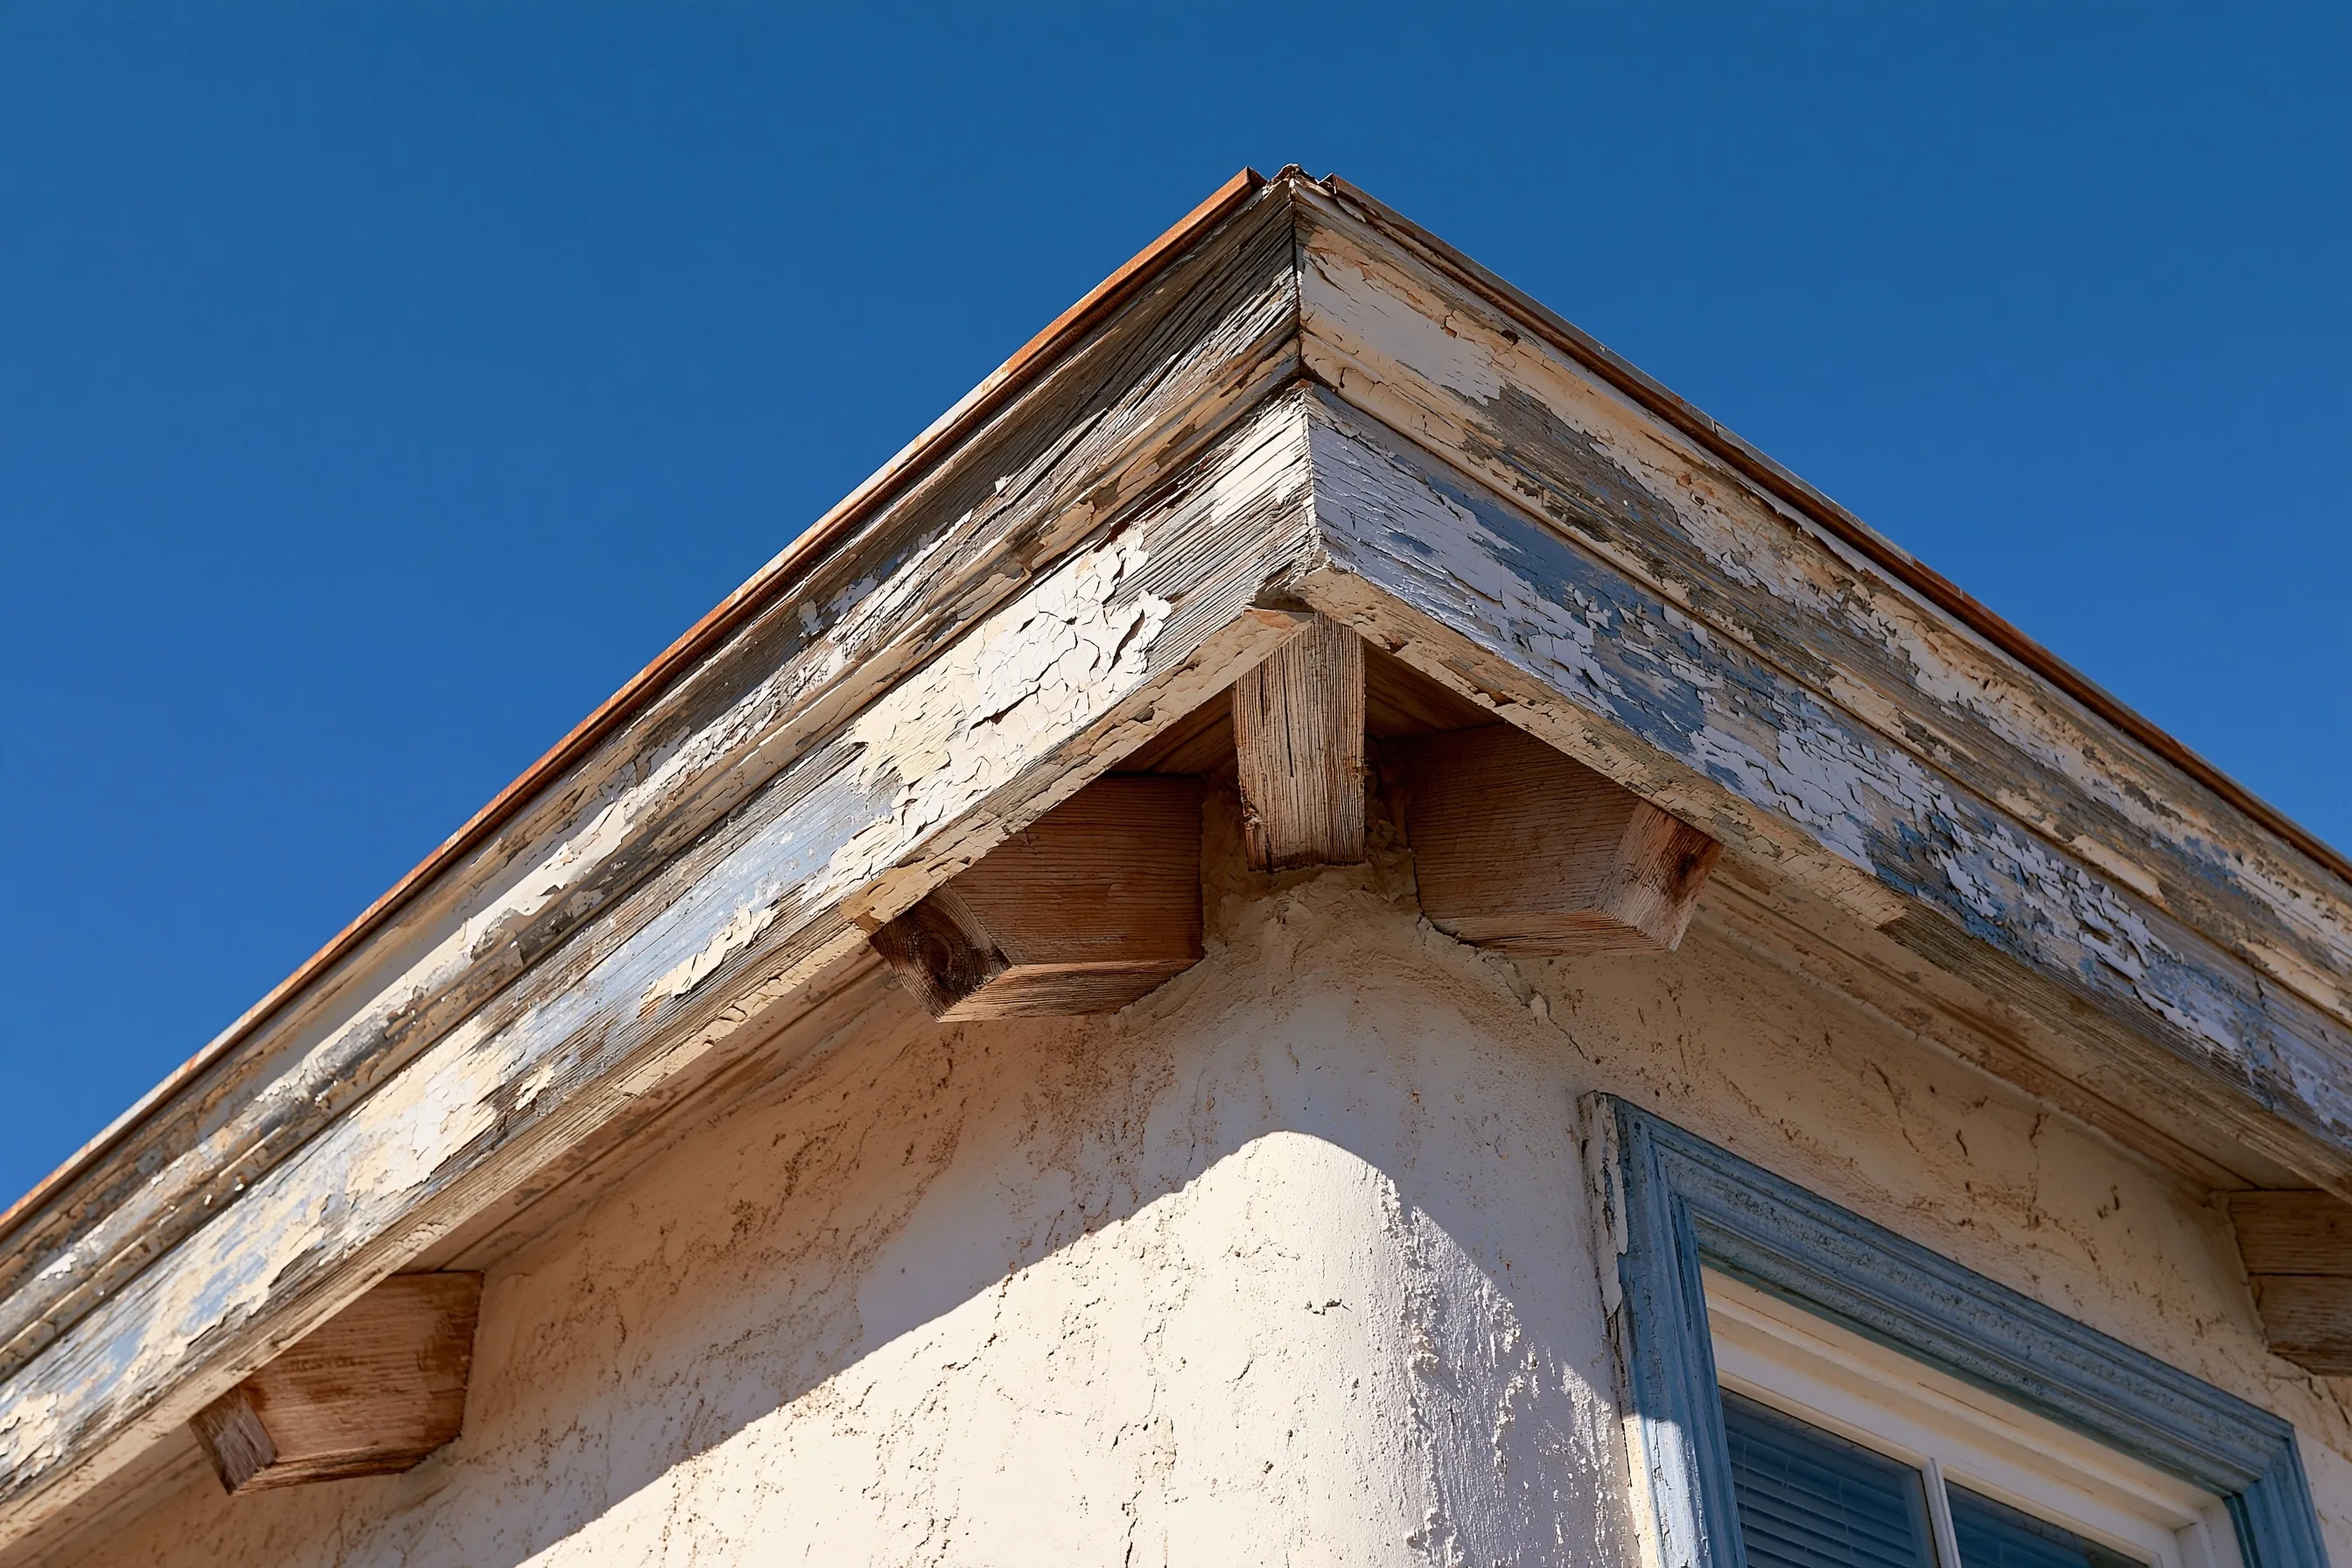
Peeling paint stripped from the eaves of a stucco house

Example project

Corner of a stucco house with wood fascia and short rafter ends peeling to bare wood above a blue window frame
Home
1950s single-story stucco house in Imperial Beach
Original request
Get the peeling paint off the eaves at the front corner for good
Testing
Lead paint on the fascia, rake boards and rafter ends; the stucco tests clear
Surfaces
Both sides of the front corner, about 100 sq ft of wood
Notice
State notice posted and sent at least five days ahead; neighbors told in writing
Estimated cost
$1,700

Scope of work

Plastic on the ground well out from the wall and sheeting hung below the eaves, the fascia, rake boards and rafter ends stripped with a paste stripper and wet scraping, waste bagged each day, primer and two coats of lead-free paint, and a clearance check of the ground and the window below. The window frame and the stucco are not part of this price.

Project overview

In this example, the owners of a 1950s stucco house in Imperial Beach watch paint peel off the eaves at the front corner, where the salt air and sun hit hardest. A test shows lead paint on the fascia, rake boards and rafter ends, but not on the stucco.

They want the lead paint gone rather than painted over, so the job is abatement. The notice is posted and sent to the state at least five days ahead, and the neighbors next door are told in writing. Only the wood is stripped, which keeps the job to about 100 square feet.

The goal

The goal is eaves with no lead paint left on them and a yard free of chips.

Process

  1. Notice Notice posted at the house and sent to the state; letters to the neighbors.
  2. Setup Plastic laid on the ground and hung below the eaves, the window covered.
  3. Stripping Fascia, rake boards and rafter ends stripped wet, waste bagged daily.
  4. Paint Bare wood primed and given two coats.
  5. Clearance Ground and window checked for chips and dust before the plastic comes down.

Planning right

  • Do not scrape or sand peeling eaves dry. Chips fall straight into the yard.
  • Look for soft wood behind the paint. Rotten ends are replaced, at extra cost.
  • The blue window frame below may also carry lead paint. Test it before it is painted.
  • Keep the clearance report with the house papers.

Get a free quoteMore about exterior lead paint removal

Old twin wood window replaced in a 1940s stucco house

Example project

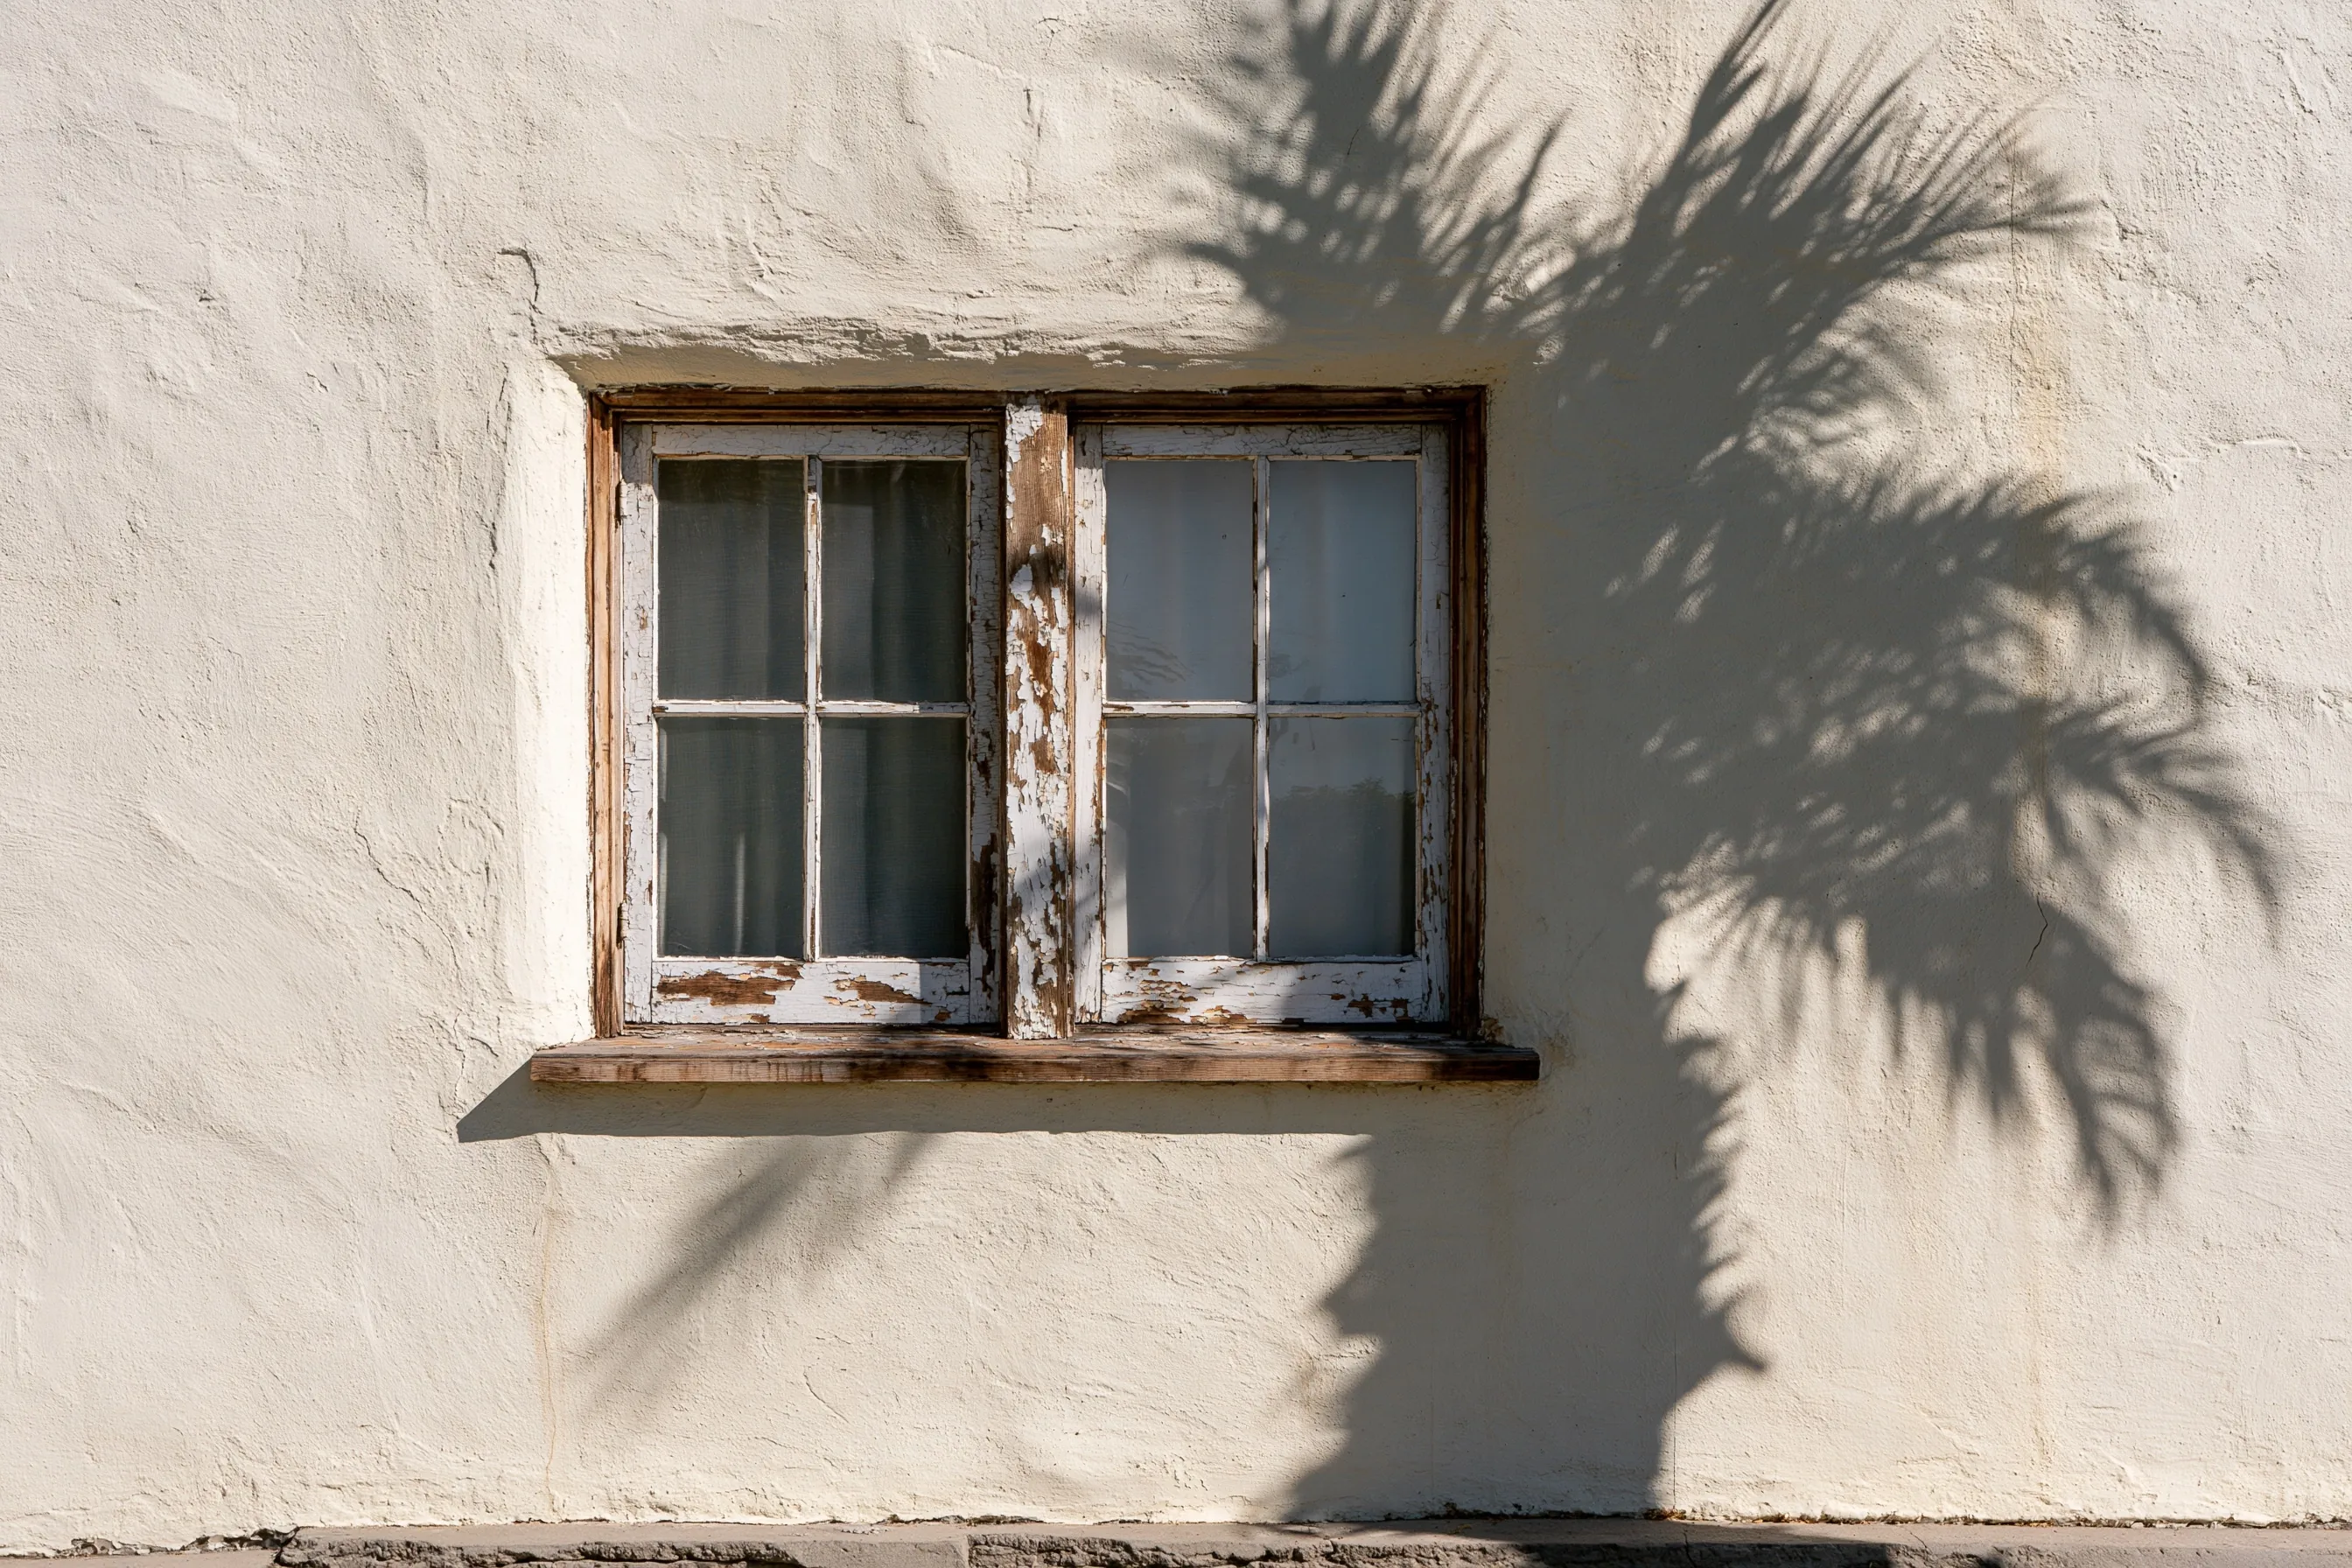
Twin wood window in a smooth stucco wall, its white paint peeling to bare wood on the frame and center post
Home
1940s stucco house in Chula Vista
Original request
Replace a peeling twin wood window on the side of the house
Testing
Lead paint on the sashes, frame and center post
New window
A twin unit of the same style set in the existing opening
Stucco
Left uncut; the opening keeps its size
Estimated cost
$1,100

Scope of work

Plastic inside the room and on the ground outside, the old sashes, center post and stops misted and taken out whole, the new twin unit set in the existing opening, the inside trim refitted, HEPA cleanup and a wet-cloth check of the sill and floor.

Project overview

In this example, the owners of a 1940s stucco house in Chula Vista have a twin wood window on the side wall whose paint is peeling to bare wood. A test shows lead paint on the sashes and the frame.

A new twin window of the same style goes into the existing opening, so the stucco is not cut. Window replacement in an older house always falls under federal lead-safe rules, so the room is sealed and the ground outside is covered while the old window comes out.

The goal

The goal is a sound new window in the same opening, with no lead dust left in the room.

Process

  1. Testing The window tested and the opening measured for the new unit.
  2. Setup Plastic laid inside and outside, the room closed off.
  3. Window Old sashes and post out whole, the new unit set and the trim refitted.
  4. Check HEPA cleanup and a wet-cloth check of the sill and floor.

Planning right

  • The city does not ask for a building permit when the new window fits the same opening in the same style.
  • Keeping the opening the same size means no stucco patch to match.
  • Old sashes leave the house whole and wrapped.
  • If the house is on the city’s historic list, ask the city before changing a window.

Get a free quoteMore about lead paint window and door removal

Lead-safe add-on to rewiring a 1950s house

Example project

Home
1950s single-story house in Chula Vista
Original request
Rewire the whole house without spreading lead dust
Testing
Lead paint on the plaster walls and the door and window trim
Rooms
Seven rooms opened one or two at a time for new outlets and runs
Lead-safe add-on
Rooms closed off with plastic, cuts misted, HEPA tools and a check of each room
Estimated add-on cost
$3,900

Scope of work

Plastic over the floor and across the doorway of each room before the electrician cuts in, misting of painted plaster and trim at each cut, HEPA vacuums on the cutting tools, daily HEPA vacuuming and a wet wipe, a cleaning check before each room reopens, and bagged disposal. The rewiring and the plaster patching are priced separately.

Project overview

In this example, the owners of a 1950s house in Chula Vista are having it rewired. The electrician will cut small holes in painted plaster and trim in seven rooms, and a test shows lead paint on both.

Each cut is small, but together they disturb well over the minor repair limit, so the work is done lead-safe. The extra cost is an add-on to the electrical job, and the family keeps living in the rooms that are not being worked on.

The goal

The goal is a rewired house with no lead dust left behind, with the extra cost limited to keeping each room clean.

Process

  1. Testing Walls and trim tested before the electrician prices the job.
  2. Room setup Floor and doorway covered, the room closed off before cutting.
  3. Cutting Plaster and trim misted, cuts made with HEPA-vacuum tools.
  4. Room check HEPA vacuuming, a wet wipe and the room checked before it reopens.

Planning right

  • Electricians are named in federal lead-safe rules too, not only painters.
  • Have the electrician’s bid say who does the lead-safe setup and cleanup.
  • Children stay out of a closed room until it has passed its check.
  • Plaster patching after the rewire disturbs paint again. Plan it lead-safe as well.

Get a free quoteMore about lead-safe renovation and remodeling

Lead-painted plaster walls sealed in a 1940s living room

Example project

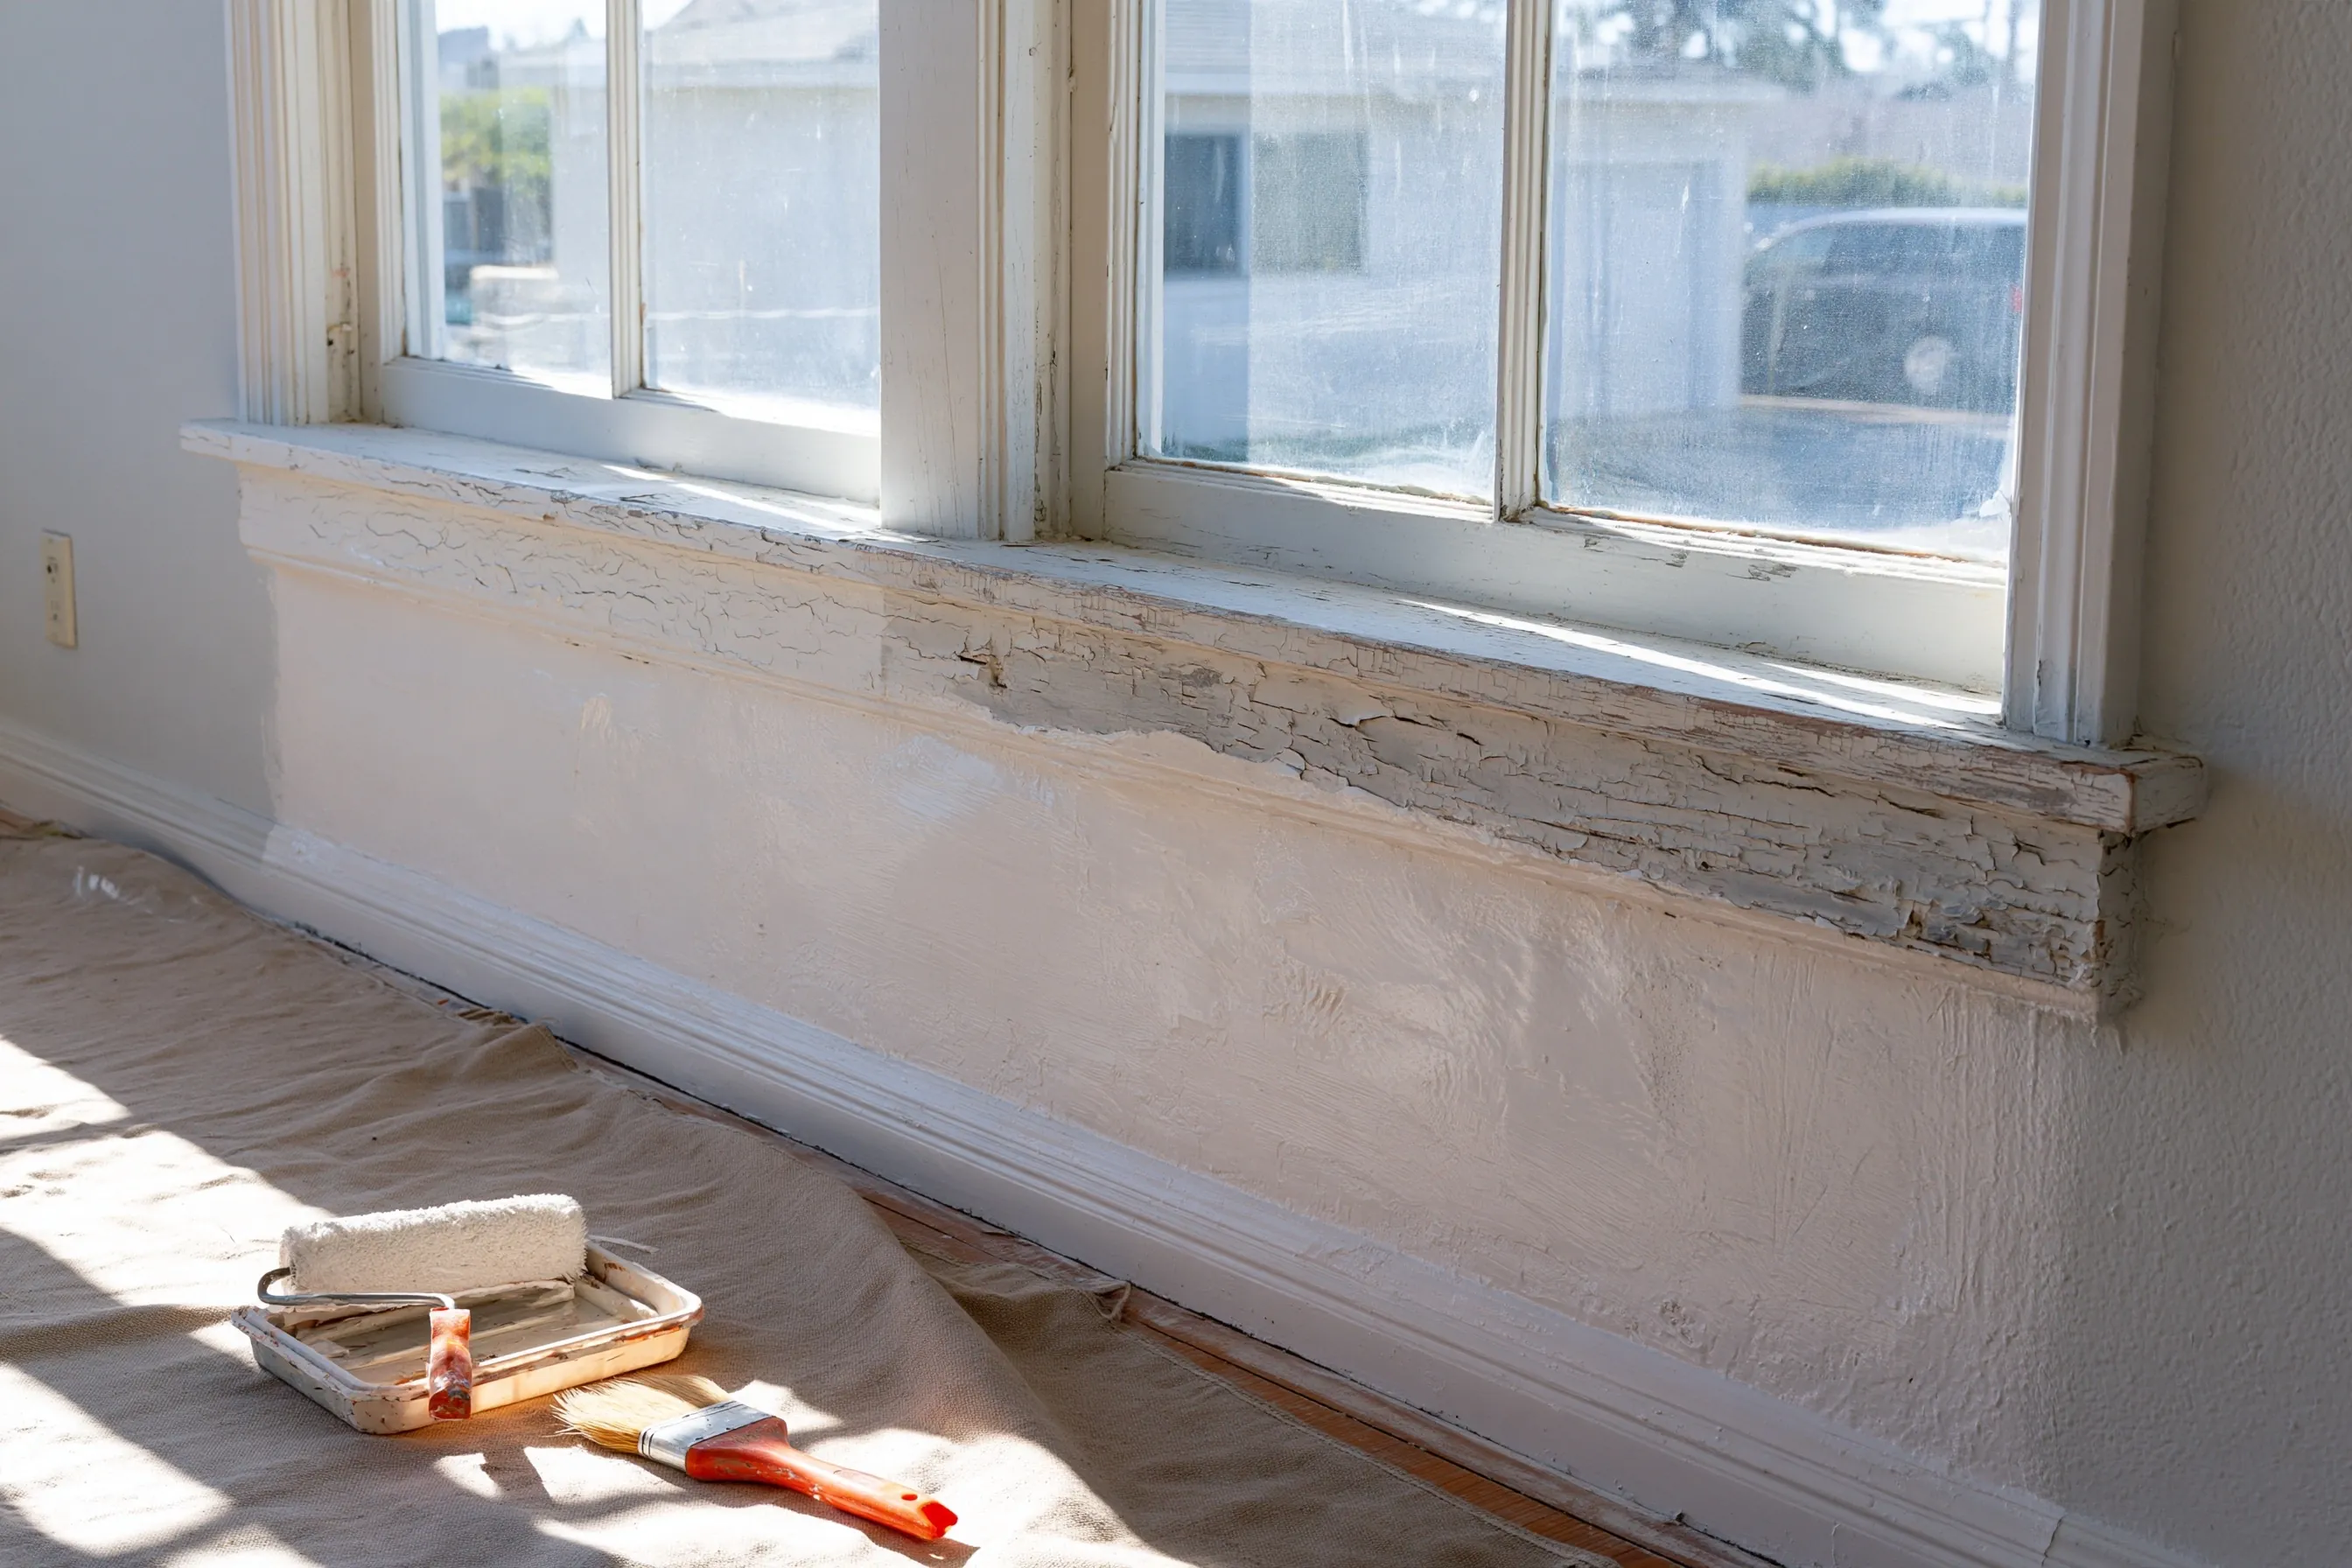
Plaster wall below a wide window partly coated smooth white, with a cracked painted sill, a roller tray and a brush
Home
1940s house in National City with plaster walls
Original request
Keep the original plaster in the living room and seal the old paint for good
Testing
Lead paint on the plaster walls and the window sill; the paint on the walls is sound
Surfaces
About 300 sq ft of plaster wall
Method
Encapsulant made to last 20 years or more, two coats, with a written plan and clearance
Estimated cost
$2,900

Scope of work

Plastic on the floor, the walls washed, loose spots misted and scraped, a bonding patch tested, two coats of an encapsulant made to last 20 years or more, HEPA cleanup and a clearance test. The window sill is not sealed; its paint is cracked, so it is stripped as a separate item, not in this price.

Project overview

In this example, the owners of a 1940s house in National City want to keep the original plaster walls in the living room. A test shows lead paint on the walls and on the window sill, but the paint on the walls is still firmly attached.

Sealing the walls keeps the plaster and costs far less than stripping it. The coating is made to last 20 years or more, which makes the job abatement. It is done by certified workers under a written plan, with the state notice posted and sent at least five days ahead and a clearance test at the end.

The goal

The goal is the original plaster kept in place, with the lead paint sealed behind a coating made to last.

Process

  1. Notice Written plan prepared, state notice posted and sent.
  2. Prep Floor covered, walls washed, loose spots misted and scraped.
  3. Patch test A small area coated to check the coating bonds to the old paint.
  4. Coating Two coats on the walls, then HEPA cleanup and the clearance test.

Planning right

  • A coating is only as strong as the paint under it, so the patch test comes first.
  • Cracked paint on the sill will not hold a coating. It is stripped instead.
  • Check the sealed walls for cracks or water stains, and keep the plan with the house papers.
  • Cutting into the wall later disturbs the lead again. Plan any new outlets lead-safe.

Get a free quoteMore about lead paint encapsulation

Lead inspection of the shared stair and walkway of an apartment building

Example project

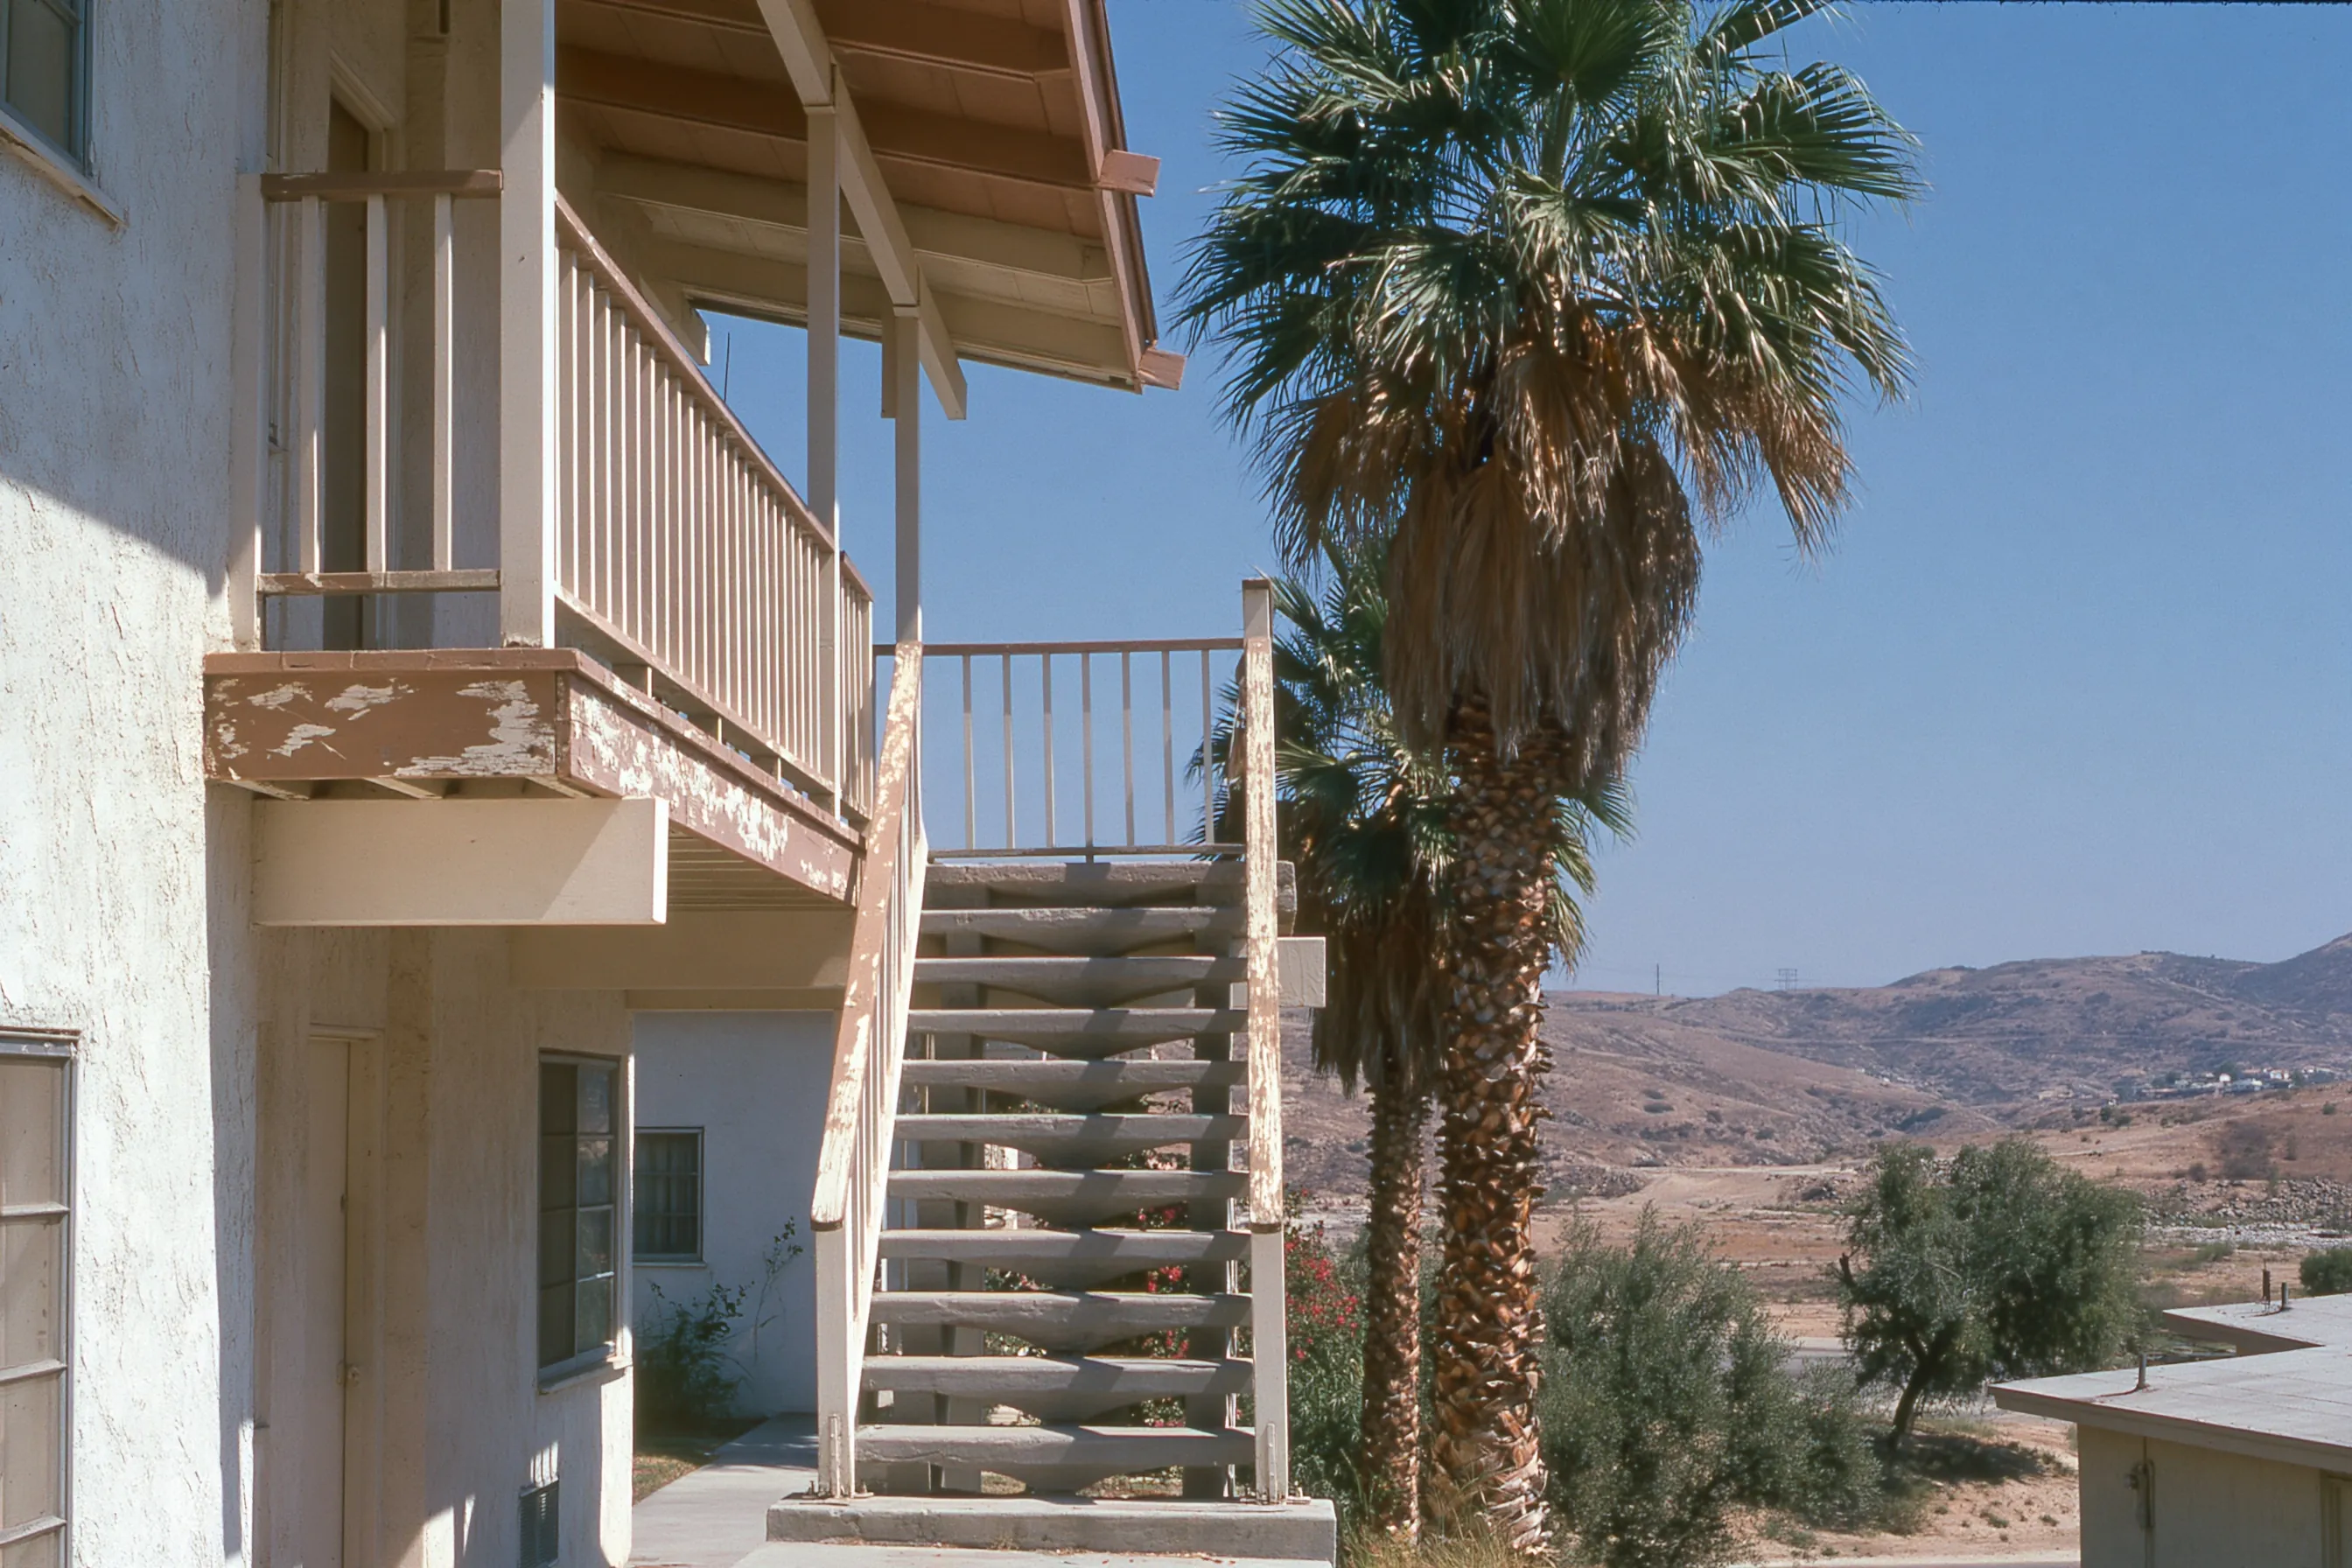
Two-story stucco apartment building with an outside stair and an upper walkway whose painted railings and edges are peeling
Home
1960s two-story stucco apartment building in Chula Vista, eight units
Original request
Know what the painter will disturb before repainting the stairs and walkway
Testing
Readings on the railings, stair stringers, walkway edges, doors and trim; soil at the foot of the stair
Found
Lead paint on the railings, stringers and walkway edge; lead in the soil at the foot of the stair
Report
A written report for the owner, the painter and the tenants
Estimated cost
$1,400

Scope of work

Readings on the stair and walkway railings, the stair stringers, the walkway edge and ceiling, the unit doors and trim along the walkway, paint chips to the lab where a reading is unclear, soil samples at the foot of the stair, and a written report.

Project overview

In this example, the owner of a 1960s eight-unit stucco building in Chula Vista plans to repaint the outside stair and upper walkway, where the paint on the railings and edges is peeling. Before hiring a painter, the owner wants to know what the paint contains.

The report shows lead paint on the railings, stringers and walkway edge, and lead in the soil where chips have fallen at the foot of the stair. The painter can now price lead-safe prep for those parts, and the owner has a report to share with tenants.

The goal

The goal is a painter who knows which parts carry lead paint, and an owner with a report for the tenants.

Process

  1. Booking Build year confirmed and tenants told when the inspector will be on the stairs.
  2. Inspection Readings on the shared stair, walkway, doors and trim, with soil samples by the stair.
  3. Report Positive and negative parts listed, with the soil result and a note on what to fix first.

Planning right

  • Lead found here goes on the disclosure at each new lease or renewal.
  • Paid repainting of the railings falls under federal lead-safe rules.
  • Cover the soil at the foot of the stair until the chips are cleaned up.
  • Keep a copy of the report for each unit file.

Get a free quoteMore about rental property lead paint work

Request a free lead paint removal quote

Send the address and the year the building went up, and tell us which surfaces or rooms you have in mind and who lives there. We'll get back to you soon with an estimate or any questions we have. Estimates are free and there's no obligation.

Call (619) 614-8101

Call (619) 614-8101